Quantcast
Channel: The League of Augsburg
Viewing all 1158 articles
Browse latest View live

My Blenheim Project - Rowe's Brigade

$
0
0
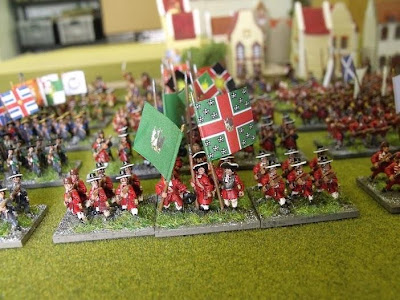
Ray King - Lt. General Lord Cutts commanded the allied left wing at Blenheim composed of twenty battalions and fourteen squadrons of English troops. His front line was the brigade of five battalions was commanded by General Rowe and they would lead the assault on the village of Blenheim.

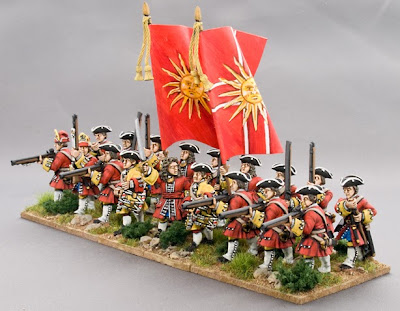
Rowe's Regiment of Scots Fusiliers 
Lt.Colonel Commanding John Dalyell (K.I.A.)
Raised in 1678 and in 1751 renamed the 21st Foot "Royal Scots Fusiliers".
Their 1704 campaign establishment was 36 officers & 593 men. 
Painted by Bob Lorton.

Ingoldsby's Regiment of Welsh Fusiliers 
Lt.Colonel Commanding Jos Sabine (Wounded in Action)
Raised in 1689 and in 1751 renamed the 23rd Foot "Royal Welsh Fusiliers".
Their 1704 campaign establishment was 33 officers & 715 men.
Painted by Bob Lorton.

Lord North & Grey's Regiment of Foot 
Colonel Lord North (Wounded in Action), Lt.Colonel Henry Groves.
Raised in 1685 and in 1751 renamed the 10th Regiment of Foot.
Their 1704 campaign establishment was 40 officers & 592 men.
Painted by Ray King.

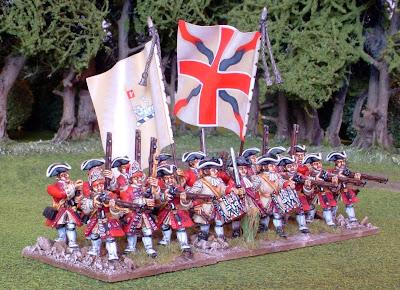
Howe's Regiment of Foot 
Lt.Colonel Commanding William Breton (Wounded in Action).
Raised in 1685 and in 1751 renamed the 15th Regiment of Foot.
Their 1704 campaign establishment was 39 officers & 577 men.
Painted by Bob Lorton.

Marlborough's Regiment of Foot 
Lt. Colonel Commanding William Tatton.
Raised in 1689 and in 1751 renamed 24th Foot Regiment the "South Wales Borderers"
Their 1704 campaign establishment was 35 officers & 562 men. 
Painted by Bob Lorton.


Column - Right!

$
0
0
Barry Hilton - Although not strictly speaking to do with our chosen blog period I thought it might be useful to give some idea of where I am concentrating my writing efforts outside of the WordTwister context.

I will continue to contribute articles to Wargames Illustrated as per usual. These normally revolve around a specific request for something to fit with a theme the magazine is running or a free choice piece based on what the LoA is doing at the time. Other content of this type is likely to appear over the coming months in another mag and also in Charles Grant's Wargamers Annual 2013.

In addition I have agreed to write a bi monthly column for Wargames Illustrated where the content is more based along the lines of what I call 'commentary' pieces. In other words, where I get on my high horse and poke a gentle digit between the ribs of some aspect of the hobby. An example from the past was the piece  'Warning, this hobby may contain nuts'  or travelling far further back in time 'Who's that bloke in the pot helmet?'.

That very bloke in the pot helmet!

Curiously, it is for these types of article that I get the most feedback for which I am always extremely grateful (except for the death threats and notes describing mutilation and decapitation). As recently as Claymore on 3rd August someone mentioned the pot helmet piece which was written more than 10 years ago. That felt nice! So, more gentle mocking but some serious points in there if you look hard enough.

The column is running under the title of Fighting Talk. Dan Faulconbridge informs me imitation is the sincerest form of flattery but from the look on his face at the time I don't think he really meant it. The first piece has already run and dealt with the issue of how units should be classified for morale purposes in scenarios.

We are considering re issuing some of the much older articles here but at the moment we are hardly short of content with CH, DOB and myself running on overdrive and pieces in the pipe from at least four further guest bloggers.

Thanks for sticking with us, the blog is really getting some traction now.

In the Shadows of History: Battle of Newtown, 31st July 1689: Part Six

$
0
0
Orders of Battle for Regimental Scale Action Using Beneath the Lily Banners, 1644 or Any Other Appropriate Rules System.

 The Jacobite ‘Flying camp’ under Justin Macarthy Viscount  Montcashel
Vanguard under Brigadier Anthony Hamilton (Commander rating: Plodder)

Regiment of Dragoons (BLB rating: Raw) 4 squadrons
Regiment of Horse (BLB rating Drilled) 1 squadron

Main Body under Montcashel (Commander rating: Average)

Regiment of Horse (BLB rating Drilled) 1 squadron
Regiment of Foot (BLB rating Raw) with pikes
Command shot (BLB rating Raw) 2 stands of muskets

OR
unhorsed Jacobite officer

Regiment of Horse (BLB rating Drilled) 1 squadron
Montcashel’s Regiment of Foot (BLB rating Raw) with pikes
Dillon’Regiment of Foot (BLB rating Raw) with pikes
Richard Butler’s Regiment of Foot (BLB rating Raw) with pikes
Fielding’s Regiment of Foot (BLB rating Raw) with pikes
O’ Bryan’s Regiment of Foot (BLB rating Raw) with pikes
2 Light guns (BLB rating Raw)


The Enniskillen Garrison under Colonel Wolseley
Vanguard under Colonel Berry (Commander rating: Average)

Wolseley’s Horse (BLB rating Raw) 2 squadrons
Wynne’s Dragoons (BLB rating Raw) 2 squadrons

Main Body under Colonel Wolseley (Commander rating: Good)

Zachariah Tiffin’s Regiment of Foot (BLB rating Raw) with pikes
Gustavus Hamilton’s Regiment of Foot (BLB rating Raw) with pikes
Colonel Lloyd’s Regiment of Foot (BLB rating Raw) 3 stands of muskets

Orders of Battle for company scale action using Beneath the Lily Banners, 1644 or any other appropriate rules system of choice.

The Jacobite ‘Flying camp’ under Justin Macarthy Viscount  Montcashel
Vanguard under Brigadier Anthony Hamilton (Commander rating: Plodder)

Regiment of Dragoons (BLB rating Raw) 13 troops of 6 figures
Regiment of Horse (BLB rating Drilled) 3 troops of 6 figures 

Main Body under Montcashel (Commander rating: Average)

Regiment of Horse(BLB rating Drilled) 3 troops of 6 figures

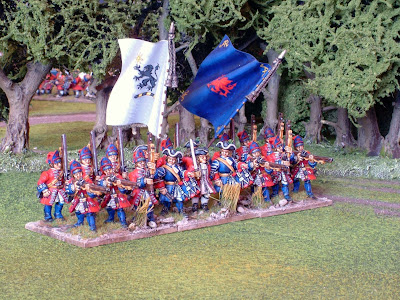
Regiment of Foot(BLB rating Raw)
3 companies of Foot (2 x 6 figures with muskets, 1 x 6 figures with pikes)
1 company of Foot (1 x 6 figures with muskets)
Regiment of Foot(BLB rating Raw)
3 companies of Foot (2 x 6 figures with muskets, 1 x 6 figures with pikes)
1 company of Foot (1 x 6 figures with muskets)

Regiment of Foot(BLB rating Raw)
3 companies of Foot (2 x 6 figures with muskets, 1 x 6 figures with pikes)
1 company of Foot (1 x 6 figures with muskets)
OR
Montcashel’s Regiment of Foot (BLB rating Raw)
3 companies of Foot (2 x 6 figures with muskets, 1 x 6 figures with pikes)
1 company of Foot (1 x 6 figures with muskets)
Dillon’s Regiment of Foot (BLB rating Raw)
3 companies of Foot (2 x 6 figures with muskets, 1 x 6 figures with pikes)
1 company of Foot (1 x 6 figures with muskets)
Fielding’s Regiment of Foot (BLB rating Raw)
3 companies of Foot (2 x 6 figures with muskets, 1 x 6 figures with pikes)
1 company of Foot (1 x 6 figures with muskets)
O’Bryan’s Regiment of Foot (BLB rating Raw)
3 companies of Foot (2 x 6 figures with muskets, 1 x 6 figures with pikes)
1 company of Foot (1 x 6 figures with muskets)
Butler’s Regiment of Foot (BLB rating Raw)
3 companies of Foot (2 x 6 figures with muskets, 1 x 6 figures with pikes)
1 company of Foot (1 x 6 figures with muskets) 
2 Light guns (BLB rating Raw)

 The Enniskillen Garrison under Colonel Wolseley
Vanguard under Colonel Berry (Commander rating: Average)
Wolseley’s Regiment of Horse (BLB rating Raw) 6 troops of 6 figures
Wynne’s Regiment of Dragoons (BLB rating Raw) 6 troops of 6 figures

Main Body under Colonel Wolseley (Commander rating: Good)

Zachariah Tiffin’s Regiment of Foot (BLB rating Raw)
3 companies of Foot (2 x 6 figures with muskets, 1 x 6 figures with pikes)
1 company of Foot (1 x 6 figures with muskets)
Gustavus Hamilton’s Regiment of Foot (BLB rating Raw)
3 companies of Foot (2 x 6 figures with muskets, 1 x 6 figures with pikes)
1 company of Foot (1 x 6 figures with muskets)
Colonel Lloyd’s Regiment of Foot (BLB rating Raw)
3 companies of Foot (2 x 6 figures with muskets, 1 x 6 figures with pikes)
1 company of Foot (1 x 6 figures with muskets) 

FEATURED REGIMENT: Gard te Voet. Dutch Foot Guards

$
0
0
Old Glory models with tricorn.

Barry Hilton - The Dutch Foot Guards or Gard te Voet or Blew Guards is a regiment the name of which is writ large during the period 1688 - 1714. By reputation they were probably the superior Grand Alliance unit of the time and heavily involved in the major campaigns of William of Orange and on. My first encounter with the Blue Guards was as part of a friend's collection in 1992. I watch them stand resolutely in Laer as I threw battalion after battalion of French infantry against its impenetrable defences. I became fixated on annihilating them. Even though they had only three figures standing at the end of the battle I failed both to destroy them and to take Laer. Those glossy and very plain models stood taunting me behind the resin gabions which they had defended. A beacon marking my total failure to emulate Marechal Duc de Luxembourg's victory at Neerwinden in 1693.

Foundry models now serving in the USA.

Alasdair had used particularly stiffly posed Essex Miniatures models which to all of us looked extremely like old wooden clothes pegs! They became known as the 'clothes pegs' and a bogey unit for me to chase whenever commanding the legions of Le Roi Soliel which between 1992 and 1994. As I have come to learn at some cost over the years, no matter how poorly a model is sculpted or painted or based it has no effect whatsoever on their ability to win or annoy the life out of you in a wargame.

A Warfare Miniatures guardsman at rest.
I have never actually recorded the service history of any Gard te Voet battalions although I have painted at least four. I still own two but will probably sell those off when I finally finish a Warfare Miniatures version.

Warfare Miniatures GtV with 'yellow facings' by David Imrie

I have rubbed up against these lads many times on the table and usually come off worst. Having walked on the banks of the Boyne where they crossed under the fire of Jacobite infantry and looked from their the lines at Neerwinden when they stood valiantly but vainly against the Gardes Francaises, I must confess to a grudging admiration for these very tough soldiers.


The plainness of their dress without lace or feather seems completely in tune with the grim and desperate struggles they were involved in. In truth, I think far too little acknowledgement is accorded to the disciplined and determined Dutch infantry of the great wars against Louis XIV. Truly it was the Dutch who shouldered most of the responsibility to keep the megalomaniacal King of France in check.

A Warfare Miniatures sergeant painted by Brian Phillips

There still appears to be some doubt as to whether their facing colour was orange or red. I have seen them painted in a variety of facing colours including buff, yellow, pale orange, bright orange and red. I have seen their coats painted on shades from a pale grey blue through to deep navy, Were their neck cloths black or red or white? Which standards did they really carry in the different phases of their campaigns?  Warfare Miniatures offer 6 different variants and these are only for Ireland! Did they have three battalions or two and a detachment of cadets? Whatever the truth the Blew Guards are an iconic regiment and this post puts them once more in the spotlight.

Two Battalions of Reiver models in action!

Clarence has beaten me to the punch by producing his own Warfare Miniatures Gard te Voet battalions. This is what I have to aim for when I finally get around to producing the regiment. Clarence has chosen to show the lads with shouldered muskets, probably just prior to wading chest deep into the swift flowing River Boyne opposite Oldbridge.  The flags are from Quindia Studios and are available in the League of Augsburg shop! This regiment in focus shows seven different interpretations of colour, models and style.

Clarence's first battalion of Warfare Miniatures...
... and the second...
... A finally some Warfare Miniatures grenadiers.


Wee Bazza's BIG Boyne Quiz: How much do you really know?

$
0
0
Barry Hilton - The bi-partizan subculture has blighted Scottish society for too long and reduced a fascinating period of British history to an atavistic war between two (or is it four?) football teams. So, in an attempt to engage my countrymen in a challenge to their preconceptions, I ran this bit of fun as a hand-out when demonstrating the Battle of the Boyne wargame at a Scottish show a few years ago.
The response was very positive and I am still alive so, infer what you will from that little tale!

River Boyne where the Dutch crossed. Copyright B.Hilton 2013

Test your knowledge.. Just how much do you really know about the infamous Battle of the Boyne 1690? No cheating! Don’t scroll down below the second photo until you’ve answered all of your questions!

  1. What was the precise date of the Battle of the Boyne and where is the site?
  2. What relation was William III to his rival for the throne James VII& II?
  3. Why did Willem of Orange, Stadhouder of Holland really want to be King of England?
  4. Which Empire was William III’s most powerful ally in his wars against France?
  5. What nationality were the assault troops at Oldbridge (the main crossing point at the battle)?
  6. How many Protestant regiments fought against William III in Ireland?
  7. Were there Catholic troops in William’s army?
  8. How big were the armies the faced each other at the Boyne and what were the estimated casualties for both sides?
Russian Roulette at a Glasgow wargame show?

     HOW DID YOU DO?
ANSWERS  
  1. July 1st 1690. The alteration of Gregorian to Julian calendars seems to have confused people. The site is in the Republic of Ireland less than 2 miles west of Drogheda.
  2. He was James VII(II)’s son in law and nephew. William was married to James’s daughter Mary.
  3. Mainly he wanted to get his hands on the English Treasury and Army to fund and reinforce his important territorial wars against his real enemy Louis XIV of France.
  4. The Catholic Habsburg or Holy Roman Empire.
  5. Dutch – The Blew Guards or Gard te Voet. Followed by French Protestants (Huguenots) followed then by Danish infantry. English and Irish regiments played a supporting role and engaged later in the battle.
  6. Several regiments were under the command of Protestant nobility and gentry who remained loyal to their King.. James VII (II). There were undoubtedly Protestant in the Jacobite Army.
  7. Yes. The Dutch were relatively speaking, religiously tolerant and Catholics served in William’s Army.
  8. William’s approx: 35,000 with estimated 500 casualties. James’s approx: 20,000 with 1,500 estimated casualties. So, in the grand scheme relatively light casualties particularly when compared with Aughrim in 1692.
Some Easy Conversions
Terrain used to restage the Boyne at Oldbridge

In the Shadows of History: Battle of Newtown, 31st July 1689: Part Seven

$
0
0

Scenario Option 1 The Battle of Newton – Historical re-fight
 Williamite Objective
You must drive the Jacobite Army from the field. Victory will be complete if you do so without losing more than 50% of your own strength

Jacobite Objective
You must hold position and repulse the imminent attack. Victory will be complete if you are able to counterattack and drive the Rebels off the field.

Deployment is shown on the accompanying map below. The game has a limit of 10 turns. As historical accounts are not specific about which flank the woods appeared on I have placed woods on both flanks.

Jacobite forces in action against a pursuing enemy

Scenario Option 2 The Battle of Newton – Hamiltonreturns!
Objectives and deployment are as per scenario option 1. The game has a limit of 10 turns

The potential return of the Jacobite vanguard.
Starting from the beginning of game turn 3 the Jacobite player is allowed to roll two D6 every turn. When the sum total of these rolls reaches 21, Brigadier Hamilton arrives back on the field having rallied his troops.

To determine exactly how many of the vanguard return roll a DAverage and consult the table below:
DAv score       Regimental size action                        Company size action
2                      1 squadron (Horse)                              4 troops (2 Horse, 2 Dragoons)

3                      2 squadrons (1 Horse, 1 Dragoon)      8 troops (3 Horse, 5 Dragoons)

4                      3 squadrons (1 Horse, 2 Dragoons)     12 troops (3 Horse, 9 Dragoons)

5                      All                                                       All

To determine precisely Hamilton’s point of arrival number the table edges 1-4. Dice using a D4 to locate the arrival. Now divide the chosen table edge into three equal sections. Roll a D3 to locate the precise point of entry. The vanguard will enter in line of troops or squadrons depending on the scenario scale chosen.

Map for Scenario One and Two


Terrain
The hill should be treated as gentle but giving an advantage to those on higher ground. BLB gives a +1 melee modifier for this. The morass should be impassable to horses and artillery. Foot should treat it as very difficult going and be disordered when in it. Some of the historical sources say that the ground in themorass had dried out sufficiently in the warm summer weather to allow the Protestant Horse to cross but for this scenario I have not allowed it. The woods should be difficult going for both horse and foot. The few buildings on the southern edge of Newtown and the woods should be treated as soft cover and could be represented as burned out cottages.

Table Size
If the regimental level game is played I recommend a 6 x 4 foot or 6 x 6 foot table. For the company level game which has far more units I would recommend an 8 x 6 or 10 x 6 foot table in 28mm scale. For a 15mm game these sizes could be reduced significantly.

Deployment
The accompanying map shows troop dispositions as far as can be determined from available sources. As a variation, players may actually wish to deploy one or two Jacobite regiments in column of march on the road out of Newton but about half way across the table. The Protestant foot can be deployed on the road also in March column but their dragoons and horse may be positioned forward of Newton and with a possibility of catching the enemy before they cross the causeway and form up with the rest of their army.


Scenario Option 3 The Battle of Newtown – Conjectural
In this scenario option the cavalry clash at Lisnaskea has never taken place and the two forces meet at full strength in open country north of Newtown.

Lay out a table on flat or gently rolling terrain. A road should run from one long table edge across and exit on the other. Each player must place three terrain features each from the following selection: Small wood, small hill, enclosure, small marshy area. Each player can choose up to three of the same type of terrain piece. Terrain pieces can be placed adjacent to each other. Once this is completed roll off for choice of long table edge. Winner chooses.  Players should then draw a map and mark on the disposition of their forces. When this is completed place all troops on the table and begin the game.


There is no turn limit on this scenario. The object for each side is to win the day.

Scenario Option 4 The Battle of Newtown – Conjectural with preliminary cavalry clash
In this final scenario option the cavalry clash at Lisnaskea is fought out before the main bodies meet. Set up a table as described in option 3. Dice for choice of table edge. Dice for initiative and the winner can choose to place a troop/squadron first or offer this to his opponent. Players should alternate placement until all troops are on the table.  The orders of battle for Hamilton and Berry’s vanguards should be used to form each force. Deployment can be anywhere up to the table midpoint on own side of table.

Surprise
To simulate the shock of two vanguards bumping into each other unexpectedly use the following method to decide which side keeps its head and maintains the initiative. Each player rolls a D6.  The player with the highest score is allowed a free move at the start of the game. This can involve declaring charges if any enemy troops or squadrons are within range. Charged units attempting to counter charge take their morale check at a +1(if BLB is used).For other rule sets modify morale test modifiers ‘to counter charge’ in a way that makes this more difficult for the force that has been surprised.

Fight five turns of play. The side which has the most intact squadrons by the end of T5 is deemed to have come off best in the fight. Any squadrons in rout or under 50% strength at the end of T5 are removed from play. Clear the table and follow the set up procedure described in Option 3 to create a new table set up. Once this is done the winner of the cavalry clash can choose which table side they wish to set up on and they can also make the opposing player deploy fully before they themselves deploy. The cavalry remaining intact at the end of the cavalry clash are added back into the main forces and can be deployed for battle.


Beneath the Lily Banners Brigade Roster Sheets - Download Free!

$
0
0
Barry Hilton - Clarence and I have been delighted with the steady growth in Beneath the Lily Banners players. The rules have now sold an impressive 2,000 copies since their release in 2008. Not a blockbuster we'd be the first to admit but in wargaming rules terms this is a success and certainly the rules have been  commercial viable.

Part of the success has definitely been due to the way we have supported the rules via the Fighting Talk forum, through articles in the magazines, with published scenarios and explanations for players to get more of a feel for the period and for the mechanisms and thinking behind each rule idea.

Further traction has been gained by running our League of Augsburg weekend gaming extravaganzas and letting players get a sense for the period in a larger setting than can normally be achieved in a home game set up.

On the last weekender I introduced Brigade Roster Sheets which did a little more than record casualties and whether a unit had fired its First Volley. I attempted albeit in brief, to give a flavour of the brigade in a short narrative. A little background behind the wee lead chappies being pushed around the table and causing such heartache for the Gladiators in charge! This format also permitted some special scenario specific conditions to be noted for particular units or brigade commanders. Sometimes the conditions or special rules were advantageous and sometimes not! Further period character was instilled through long held grudges and the personality idiosyncrasies of colourful individuals.

A quick walk through the Roster will help users. In the top scroll should be placed the name of the brigade for example The Brigade of Count Solms. In the larger scroll area below an optional description of the brigade and its constituent units can be given. Any special rules pertaining to the units, weapons, opponents or commanders can be detailed here.

The sheet allows for four units to be recorded. The section with 18 boxes represents the total number of models in an infantry battalion. A line separates each group of 6 boxes. Each therefore represents a stand of models. When a casualty is received simply mark or cross the appropriate box on the grid.

Two scrolls on the right hand side of the grid allow players to note the unit type ie Pike and Shot or All Musket. The scroll below is used to note the training/morale level of the unit ie Drilled.

The small cloud of smoke on the top right of each grid is not a touch of frippery! In this cloud cross or write FV when the unit has delivered its crucial FIRST VOLLEY.

The grid can of course also be used for brigades of Horse. Each 6 box section of the grid represents a squadron. One, two and three squadron regiments can be accommodated on a single grid with the numbers 1,2 and 3 being noted at the top of each 6 box section to represent the appropriate squadron. A four squadron regiment will require the use of two grids. The scrolls on the right hand side of the grid can be used to note Bullet or Blade type together with the quality of the unit as per the infantry notation.

Artillery can be easily fitted into the grid system too.

Requests for access to these sheets by some attendees of the games led to Clarence volunteering to professionalize my amateurish Power Point effort. The result in my opinion, is very Harrisonesque and appealing! Here on this thread you can see the evolution from the raw form through to a filled in example through to a downloadable and extremely smooth professional version which is of course free! Use it as much as you like.


We hope it comes in useful. Thanks for requesting it, thanks for doing a bang up job Clarence!

More from us on BLB soon...

FEATURED REGIMENT: Dal Regiment

$
0
0
Bart Vetters - The Swedish Dal Regementet (Regiment) during the Great Northern War was one of the 'high profile' regiments that were present in all of the major battles and spent most of their time, certainly during the 'main event' of the 1708-1709 Russian campaign, as part of the King's Army. The were one of the standard 'Indelta' regiments, which were raised from specific provinces in Sweden, in this case the Dalarna province in central Sweden. The Indelta regiments (the name comes from the name of the recruitment system itself, 'Indelningsverket', and has nothing to do with any river delta anywhere, something that still occasionally confuses me :) ) were the closest thing to a regular army that existed at the time of the Great Northern War and were thus ususally the best equipped and trained.

The Dal regiment was sent to Zeeland with the rest of the King's army and stayed with it until a fateful summer day on the dusty plain near Poltava in the Ukraine. It thus participated in all of the battles of the King's army, including the ones of Karl's 1708 - 1709 Russian campaign (the second and - unfortunately for Karl - a campaign too far). By the time of that campaign, the Dalcarla ('men from Dalarna', and often mistakenly used as the name of the regiment) had obviously become somewhat of a favourite of Karl's - not always a good thing if you're looking for a comfortable spot in battle. At Holowczyn, Karl's favourite battle (it should be - he attacked at night, across a major river, through a marsh against a numerically stronger enemy that had entrenched itself uphill - and won), they were in the first wave, one battalion crossing with Karl himself, a dubious honour shared with only the Lifeguard battalions. At Malatitze a few weeks later, it was the Dal regiment that Karl sent first to aid the Swedish regiments that had been surprised in camp, and it was the only one from the relief force to see actual fighting.

At Poltava, the Dal regiment was in the column of Major General Roos and was among the units that got caught up storming the Russian redoubts. They never made it to the main battle, as they and four other battalions were chased into the woods besides the redoubts, and then all the way down to a cloister overlooking Poltava itself. Here the remnants of Roos' group, including the Dal men, eventually surrendered, depriving the main army of a third of its infantry strength for the main battle.

After Poltava, the Dal regiment was reraised, surrendered at Tönningen with general Stenbock and was raised a third time to join in the 1717-1718 Norwegian campaigns that ended with the death of Karl (which to this day is highly controversial, but that's another story).
The Dal Regiment as they would have appeared at Poltava, though possibly much more scruffy looking. The figures are all Musketeer Miniatures, with a tiny conversion (head swap on the officer and NCO). The flags are printed scans from the Höglund book (see references). Painting by the author.

Uniform wise, the Dal regiment is an archetypical Swedish GNW unit: blue coat with yellow facings, leather vest and breeches and yellow stockings. Headdress is the equally archetypical Karpus, in this case blue faced yellow. Höglund notes that in 1707, new recruits sent to the Dal regiment had black hats (tricornes) and the reraised versions of the Dal regiment also wore hats instead of the karpus. I have however opted to represent my Swedish and Russian units as they would have appeared at the battle of Poltava, and have chosen the karpus for the Dal regiment, conveniently applying a bit of wargamer's license to forget about the hat wearing new recruits. 

Headwear for the grenadiers is mostly speculative. While it is more likely that the grenadiers wore hats just like the other musketeers, references to and examples of actual grenadier mitres used by Swedish units in the GNW do exist, and Höglund has the grenadiers of the Dal regiment as wearing 'grenadier caps of unknown appearance'. In my version of the regiment, I have thus opted for classical grenadier mitres.

That's all for the Dal regiment. Next is a regiment decidedly unarchetypical, sporting red facings instead of yellow.

References: 
The Great Northern War 1700 - 1721, Colours and Uniforms, Lars-Eric Höglund & Åke Sallnäs, Acedia Press, 2000
The Dawn of the Tsarist Empire: Poltava & the Russian Campaigns of 1708 - 1709, Nicholas A. Dorrell, Partizan Press, 2009
The Battle the Shook Europe: Poltava and the Birth of the Russian Empire, Peter Englund, I.B. Tauris, 2003

The Höglund book is the definitive source on unifoms & flags. The Dorrell book is very useful for concrete information on troop strengths & dispositions during the Russian campaign that translate directly to the tabletop, and the Englund book is the definitive history of the Poltava campaign.

My Blenheim Project - Webb's Brigade

$
0
0
Ray King - Webb's brigade only consisted of 4 battalions and positioned in the centre of the field...
Churchill's Regiment of Foot "The Buffs" 
Lt.Colonel Commanding Henry Peyton (Wounded in Action)
Raised in 1664 and in 1751 renamed the 3rd Regiment of Foot.
Their 1704 campaign establishment was 31 officers & 559 men
Painted byBob Lorton

Webb's Regiment of Foot 
Lt.Colonel Commanding Richard Sutton.
Raised in 1685 and in 1751 renamed the 8th Regiment of Foot.
Their 1704 campaign establishment was 35 officers & 704 men
Painted by Bob Lorton

Meredyth's Regiment of Foot 
Lt. Colonel Commanding Thomas Bellew.
Raised in 1702 and in 1751 renamed 37th Foot "Hampshire".
Their 1704 campaign establishment was 32 officers & 543 men
Painted by Bob Lorton

Orkney's Regiment of Foot (1st Battalion) 
Colonel George Earl of Orkney, Lt.Colonel Commanding John White (K.I.A.)
Raised in 1660 and in 1751 renamed the 1st Royal Scots Regiment of Foot.
Their 1704 campaign establishment was 38 officers & 601 men
Painted by  Bob Lorton


Gardes Françaises Revisited

$
0
0
Clibinarium- A while back we previewed the first of our Garde Françaises models, and it would be fair to say they have caused us nearly as much trouble as they did their Anglo-Dutch adversaries.

First though, the good news; the Garde command. The first thing to note is that these are the first Warfare Miniature figures to be done with the new blank dollies that we've spent so much time over. They are practically invisible under the sculpting; only really the bases show.  However they do lend a high degree of consistency in terms of proportion and posing. this will become more apparent as we continue to build up figures using these dollies.


I tried to follow the wonderful Giffart plates as much as possible. My favourite figure by far is the officer doffing his hat in the plate Le salut de L'Esponton  sur le poignet ; there was no way I was neglecting the possibility of sculpting that pose, as there was something quintessential about the period held within it.

One rather peculiar thing about these officers' uniforms is the fact that they are quite varied. The sergeant does not seem to have much lace on his coat; much less in fact than the rank and file. The officers have different patterns on the cuffs and coats in some cases. It is perhaps easier to see these differences in the coloured Knotel plate which clearly takes Giffart as its source. The officer with the zig-zag lace pattern on his cuffs is an ensign, but as he and the other officers are open-handed they can be used as either officers or ensigns, if you are not picky about absolute accuracy. Indeed with a change of colour scheme they could probably serve as any regiment's officers. Note also the sergeant's odd polearm; the lower cross bar has one straight arm and one bent upwards. While it would be more usual to see symmetry here it is very clearly depicted by Giffart so I have followed his work in this instance.


 Again I have gone with the early, informal tricorn look on some of the officers, the brims of the hats depicted by Giffart are very wide and would look huge if worn plain and unpinned. An awkward technical aspect of these men is that all but the drummer appear to have carried their swords on a belt under the coat, which then protrudes though a vent in the skirt. This means that the swords have to be a part of the figure, rather than a separate item, as with most Warfare figures. Separate swords make for easier casting and a more realistic look to the finished figure, but can only be done properly when appended from an belt worn over the coat.


 Because the book concerns itself with drill in the main there are no close up images of the drummers, though tantalisingly they can be seen as small figures in the background of many of the plates. Though French drummers are sometimes depicted with the drum secured high under the left arm they can be seen in these pictures to have the drum at the more usual waist height, so I went with that (in some instances they appear to have it on the right hip, which is somewhat unusual). For the drummer's lace, it was hard to find any good contemporary images, most being from well after 1700. I had suspicions that the "chain" pattern familiar from the 18th century may not have been adopted at this point. The only image I could find that was identifiably from the 17th Century appeared to be dated around 1680, which while a little early seemed to me to be better than a little late (the high position of the cuff suggests the 1670s onwards). I should write "identifiably depicts" rather than "identifiably from" as it is likely a Victorian era painting, so I don't have complete confidence in it, but the other figures in the set do seem to follow Giffart. There is a set of plates by the artist Eugene Leliepvre, which cover the French army from about 1660 to 1790 which do have an illustration of a drummer from this time, but unfortunately I don't have a copy and they are quite hard to come by. The thumbnail version of it that I have seen seems to follow this plate, so I was willing to take the risk on it


As an aside the link I gave to the plates of L'Art Militaire François seem now to be broken, but you can see many of them in this Youtube video (courtesy of Ralph Mitchard). Great music too.


You may recall from the previous post that the rank and file Garde figures had a bit of a tortured gestation. It turned out not to be over; they were cast up and while the pikemen turned out fine, but there was a problem with the musketeers.

I had selected the pose Mousquets sur l'épaule for these figures as seen in the Giffart plate. However, metal figures have to be cast in a flat mould, so while they are 3D models, they have to have a 2D aspect so they fit in a mould which is in two halves. Imagine taking any figure and putting it between the palms of your hands, as if closing a book. Generally there won't be a part of the figure sticking out into the flesh of your palm. The figure will have a single axis, usually running from shoulder to shoulder, if there is another axis, especially if it is a right angle to the primary axis, then there will be problems in casting.

If you think of the Mousquets sur l'épaule pose you can imagine an axis running from shoulder to shoulder and the rest of the body is pretty much in that plane. However you'll also notice that the musket balanced on the shoulder forms a right angle with that axis, and projects backwards and forwards from the primary axis.
In order to get round this problem I decided to reduce the degree of this projection by keeping the pose but moving the musket to a more vertical position so that it projected "up" more than "back", which you can generally get away with because it then doesn't project back any further than the depth the body of the man makes in the the mould. Problem solved.

Except...by moving the musket to a more vertical angle it contacts the brim of the hat, so I anchored each musket to the side of the hat with a small amount of putty. It becomes entirely evident why hats started to be turned up at the side and why tricorns were worn at an angle; the musket will tend to knock off the hat if shouldered vertically. There is very little to no space between hat brim and musket barrel, so it was thought better to attach them at  the point of contact to ensure a tiny space between would not cause casting problems.
The figures were cast up and they came out all right, but there was a slight flaw. The pressure of the moulding process had bent the musket a bit. This is not unusual, and the musket can be bent back by hand easily enough, this time however the fact that the musket barrel was attached to the hat meant that part stayed put and the portion below bent, giving a distinct kink on a couple of the figures which was not easy to bend back. Then it dawned on us that not only was that an issue, but after all the initial problems with proportion the original musket had been slightly too short anyway. Neither of these two issues were major, but both Barry and I tend to be unhappy with even slight flaws, and we weren't content to let these figures go ahead.

We chatted about how to solve it and I thought the ideal solution was to have left separate arms, but I didn't expect that to be practical as generally speaking castings have to be single piece, because often customers don't like sticking figures together. To my surprise Barry wasn't averse to that suggestion, and since we didn't think it was a huge amount of work ( nobody had complained about having to do so with the cavalry ), we decided to go ahead with that approach.
 With that decision came distinct bonuses; now the original pose of the figure in Mousquets sur l'épaule could be much more closely depicted as the issues with two axes rather than one were no longer present. Also the original decision of  having to pick either matchlocks or flintlocks (but not both) was no longer necessary, as the arms were separate we could do two arms, one with a flintlock and one with a matchlock, allowing people to decide what sort of mix their Gardes would have. As far as I could tell the arrangement of equipment did not differ significantly depending on the type of firearm (i.e. the matchlock armed men don't wear the twelve apostles), so this idea seemed to work.

So the musket arms were amputated, new arms were made, and at Barry's suggestion we did two more arms with grounded muskets to widen the possible poses further. Not being completely happy with how I had done the cartridge boxes I took the opportunity to improve them. Originally I had just etched in the pattern on the flat surface of the covering flap as that's what seemed to have been done in reality on its leather surface. Having seen how that came out on the first group cast figures I wasn't convinced that it worked; the detail was quite shallow and might disappear under a layer of paint. I decided to make it much more raised and slightly exaggerated, so that a wash or drybrush would show it up nicely. Had I know how long this would take I might not have started; it had to be done on each of the figures separately, since the correction was being made after the dolly stage (had it been caught earlier a correction to the dolly alone would have solved everything). You can see in these photos that the putty that has gone a nasty green colour shows that they have been through the moulding process once already (the heat discolours it), the light grey putty shows where corrections or alterations have been made.


Now we  have to keep our fingers crossed and hope that these revisions cast properly. A lot of issues are in the lap of the casting gods, and it is as important to the final outcome to have a good caster as it is a sculptor. This will have hopefully given you some insight into the process of getting figures made, and the little pitfalls that can delay things. Sometimes particular figures can feel jinxed, so I am somewhat wary of the Gardes Françaises until I see them successfully moulded and in the palm of my hand.

In the Shadows of History: Battle of Newtown, 31st July 1689: Part Eight

$
0
0
Beneath the Lily Banners Special Rules Recommendations
BLB has several additional rules which can be used to give this action some further depth and flavour. I recommend the following are used:
Capturing colours and standards p26
Melee modifiers for Jacobite Horse p32
Melee modifiers for Jacobite/Williamite foot p32
 If you do not have BLB I suggest that you make the Jacobite Horse superior in melee combat to the Williamites. I also recommend that you give an extra ‘religious antipathy’ melee bonus when the foot of each side charge into combat.

Modifying the Scenario for Other Periods.
This scenario could easilytranspose into other periods with little or no adjustments. I suggest the following would be easy to do
  • An AWI early period encounter with locally recruited Loyalists and American volunteers clashing on the march.
  •  ECW early to mid war encounter anywhere in the country with the retinues of important local men meeting as they march towards each other.
  • An early war ACW clash between large but inexperienced regiments of volunteers perhaps even from the same State.
Results
There is enough variation in the scenario options to fight four different games. The sides although not equal are close enough to give each force a chance of winning without being sterile and even on the points or army list principle. I have enjoyed the challenge of this game on several occasions and am certain some of you will too.

References
Books
‘A Jacobite narrative of the war in Ireland’ (a project from the history department of UniversityCollege, Cork)
‘The popular history of England’ (Charles Knight, 1859),
‘The Battleof the Boyne’ Campaign title 160 (Michael McNally) Osprey Publishing
 ‘William III at war in Scotland& Ireland’ (Alan Sapherson) Raider Books
‘The Succession of Colonels of the British Army from 1660 to the present day’ (NB Leslie, Society for Army Historical Research, Special publication No11, 1974)
 ‘The Boyne & Aughrim, The War of the two Kings’(John Kinross), The Windrush Press
‘Irish Battles A military History of Ireland’ G.A.Hayes-McCoy (Appletree Press)
‘1644’  ECW Rules (Rick Priestley) Wargames Foundry
‘Beneath the Lily Banners’ Fast play wargames 1660-1720 (Barry Hilton 2008) WordTwister Publishing
Beneath the Lily Banners 2nd edition 1660-1720 (Barry Hilton 2011)
And of course the Battle of Newtownbutler book found on the reading list post!

Swedish Flags for Poltava

$
0
0
The Swedish flags for the GNW are finally ready and should be available from the LoA shop soon.


This release provides all of the foot units that were present at Poltava. The last sheet is actually variations for Skaraborg, Uppland, and Kalmar based on descriptions given by the Russians at Poltava - there are official government versions for these units scattered through the other sheets for those who want the earlier flags. Again, thanks to Örjan Martinsson (Tacitus of the Fighting Talk forum) for all of his help sorting through these.

FEATURED REGIMENT: Clare's Regiment

$
0
0
David O'Brien - The first time I painted this battalion way back in the late '70's I knew nothing of the history or family connection with this unit. I was asked to take part in a 15mm Seven Years War campaign and they were looking for more French players, I was shown loads of illustrations of uniforms to choose from but thinking that most of them looked boring in white/light grey but some in red coats stood out especially the one with yellow facings plus I loved the flags so the regiment was duly painted up from the old Minifigs soldiers that used to be sold in strips. This particular campaign didn't last too long mainly because none of us were too taken with the 15mm figures and they were sold at the old Northern Militaire wargames show.

The next attempt at painting this regiment was a few months later and this time it was using Minifigs 25mm figures and using the WRG rules. It was only at this time that I found out that this unit was an Irish unit called Clare fighting for the French and for the moment that was as far as it went. This campaign lasted for about six months and again the figures were sold off and for a couple of years I got sucked in by various other periods.

I was eventually asked to take part in some Marlburian games and was sucked back in but this time I was asked to paint British troops as they had enough French players. One of the first units I painted up this time using Foundry figures was Webb's Regiment which had the same yellow facings as my favourite French unit. We were still using the WRG rules with 24 figure units but not long after we switched to Koenig Kreig rules which only used 12 figure battalions so half of Webbs now joined the Hanovarian army for a couple of years. Eventually I got involved with Barry Hilton and his Beneath the Lilly Banners rules which I much preferred, the only problem was that those rules used 18 figure battalions so half of the Hanovarian unit rejoined Webbs and the remaining 6 were put aside. Although my troops were all for the War of the Spanish Succession it was Barry that started to get me interested in the Jacobite Irish campaign and realising I knew very little about the period I started doing some research then found that some regiments had been formed by D. O'Brien.

The D. O'Brien was actually Daniel O'Brien 3rd Viscount Clare and he formed three regiments in 1689 to support James II for fighting in Ireland. He himself commanded Clare's 'Yellow' Dragoons, whilst his eldest son commanded O'Brien's regiment and the youngest son Charles commanded another one. It is the regiment commanded by the eldest son that was transferred to France in return for supporting French troops sent to Ireland and O'Briens went on to carve out an unrivalled name for themselves as part of the Wild Geese and fought in every major French battle in the 18th century.

Having had enough of painting Brits those 6 discarded troops were brought back out of their box and given another 12 reinforcements they returned as my favourite 'French' regiment. The regiment was known as O'Briens for the first few years of its existence in France until the father died and the eldest son now became the 4th Viscount Clare and it remained as Clare for the rest of its career until it was combined with Berwick's regiment in 1775.

Daniel didn't remain in charge of the regiment for long as he died of wounds received at the battle of Marsaglia in 1693 and the regiment was led by Richard Talbot until he was imprisoned in the Bastille by Louis XIV and the youngest son Charles now took command in 1696. From this point on the O'Briens either led or held major ranks in Clare's regiment throughout it's history.

I've never managed to come  across any specific reasons why the Irish regiments wore red uniforms. I did read a reference in the past that mentioned that O'Briens had been given light grey uniforms when they arrived in France but quickly dyed them red. I assume the yellow facings come from the O'Brien coat of arms.

Likewise I have never managed to find any definite information on Clare's Yellow dragoons, was this because of the colour of their facings or did they wear yellow jackets which I have seen in some illustrations.

There had been a previous Clare's regiment formed by the 3rd Viscount when he raised a regiment of Irish troops for the Dutch States army in 1674 which he only commanded for a year before being dismissed. The regiment went through a few commanders until Thomas Tollemache commanded it in 1685 when the regiment was transferred to the English establishment and ironically went on to fight against king James in the Irish campaign. This regiment later became the 5th regiment of foot and finally the Northumberland Fusiliers with their home base at Alnwick which is only about 60 miles away from where I currently live.

Unlike 'Sad Git' Hilton, I don't keep records of my units so I can't tell you how many battles they have won or what they had for breakfast, the only comment I can make is that under my command they have never been defeated but I'm sure that's a record that due to end in tears.

I hope this short history has inspired you to get out and paint more of these fantastic Irish troops?

BATTLE PHOTO FEATURE: NEERWINDEN 1693

$
0
0
NEERWINDEN 1693: The fighting around Laer by LoA

I have never been one to resist the temptation of joining in a debate, particularly a controversial one. Seeing the mentions recently on this blog about the various perspectives on whether wargames should be permitted to look 'too good' or as an egalitarian alternative should assume a kind of Soviet sameness, I offer up some reasons why I believe they should at all times look as good as they possibly can.

Unfair odds: a lone battalion face the Maison du Roi
Effort inspires. Human beings love to keep getting better whether than be in sport, in business, entertainment, at cooking, acquiring knowledge or some other dimension of performance enhancement. My venture back into this hobby at 24 was solely a consequence of the inspiration drawn from the outstanding work from the best names in the hobby and featured in Miniature Wargames every month.

A sweeping advance by the chevaliers of King Louis XIV
Since that joyous re-acquaintance with a boyhood passion I have never had a single faded - jaded day when I didn't not want to do something connected with my hobby.


Today I worked on tidying up the next phase of Warfare Miniatures development. Having spent  heavy duty time packing, stock ordering and nosing through spread sheets to the comforting tones of Bill Nelson and Be Bop Deluxe for twelve hours, I am finishing the day poking through some old photo files in my vault.


I have stumbled across pix of a game which have never seen the light of day in full basically because I forgot all about them. It was run at Partizan, Newark probably in 2007 or 2008. It is the Battle of Neerwinden sometimes called Landen. I have fought it several times as a wargame both as a whole and in parts.


Here I offer no historical perspective on the battle just a series of nice shots of a lovely visual spectacle. Presented with my figures on Adrian Howe's beautiful terrain it drew much attention on the day and looks just as good now as it did then.


If this is wargames porn then I am a pornographer without shame. Enjoy my dark secret and damn the eyes of wargaming's Mary Whitehouse Brigade. Mediocrity breeds the same.


The League of Augsburg is 20 Years Old

$
0
0

I realized by accident the other day it is 20 years since I started using the name League of Augsburg. The LoA is currently in a very vibrant phase of existence. We have a super squad supporting our efforts in the UK and our US Chapter is alive and kicking through Clarence and Bob Miller’s Le Roi Soliel. For something that started as a one off flag of convenience name to prevent anonymity at a small show, the old duster has worn quite well.

The chap who offered the name participated in a solitary show game and contributed not a single model yet his casual suggestion outlasted him by 19 years. I have seen him occasionally at events in Scotland and he is still perhaps blissfully unaware that it was his idea. Mr Anon was an infrequent member of an extended gaming circle during 1992-93 but quickly fell by the wayside mainly as he seemed to have little interest in doing anything more than talking about games. Ironically, the name is not what I personally would have chosen. It seemed a bit pretentious at the time and has only sat comfortably with me through familiarity of use. I however had no alternative to hand and for the sake of a scribbled piece of paper to mark our table space at a small show, it seemed churlish to object.
So, with a shrug and a ‘whatever’the name by which my wargaming efforts have been identified for 20 years was born without any input from me! It was actually adopted by hosting clubs to badge our gaming efforts before we officially used it as a moniker. Our utilization of the title was conditioned by others’ use. When requesting tables at shows I would simply say ‘put us down as League of Augsburg like last year’.
The League of Augsburg is neither a club nor a society. It has no rules, no membership list, no fees and no meeting place. It is about as intangible and anarchic as is possible for something which has physical presence and requires organization. Originally I worked with one other like-minded individual on projects relating to the 1685-1697 period and the name was completely fit for purpose.
David Imrie joined us after a couple of years and we branched into the Crimean War, Dark Ages and Thirty Years War.  A couple of guys tagged along for the ride occasionally but we quickly saw they were about what they could squeeze out for themselves by way of trade discounts and reputation. They got bulleted pretty sharpish. This was a highly productive phase with broad consensus on what we were doing and why. For reasons best known to himself, my original partner pulled out with no notice around the turn of the century and I was in my first solo phase by about 2002.

I began a long and intense engagement with World War2 in various scales. I exhibited many games during this period often with David. There was a bit of a revival of the three way collaboration in the early 2000s with some further WW2 and Renaissance but that died out quite quickly when the third leg of the tripod once again unreliably dropped off with no warning. For about four years between 2006 -2010, League of Augsburg was a totally solo project. It was during that time that I put on a wide variety of games with occasional input from some friends. I have displayed WW2, Napoleonic and Grand Alliance period projects during that second solo phase. For me, this was the most satisfying and productive period up until that point as no compromise was necessary and I could pretty much do what I wanted. During this time I upped the level of engagement with magazines particularly Wargames Illustrated.

Collaboration with people like Clarence Harrison, Adrian Howe and a growing friendship with Dave O’Brien through our mutual participation in the League of Gentlemen Wargamers has led to the modern incarnation of the League of Augsburg. Over the last three years or so the LoA has become much closer to an entity than it has ever been in the past. The threads connecting it all together are The Fighting Talk Forum, participation at shows, Warfare Miniatures, Quindia Studios, Wordtwister Publishing, The League of Gentlemen Wargamers and finally the LoA Weekend Game extravaganzas and One- Dayers run by Bob, Ade and I.
The modern LoA has a very collegiate feel with a multi-talented bunch of close and more loosely associated friends. Clarence, Bob Talbot, Dave O’Brien and Adrian Howe form the hard core of what we produce these days with Gerry Donohoe more recently being very prominent. David Imrie has many of his own projects running but is still to my mind an Augsburger! Clibanarium is sculptor in residence and we have a wide circle of friends and gaming buddies who regularly attend events run under the banner.
I had not intended to write this piece but the more I thought of the journey and reflected on how many times over the years people have actually asked the question ‘what exactly is the League of Augsburg’ or ‘can I join the League of Augsburg’ it seemed relevant. No one can join because there is nothing to join. On the other hand, everyone can join because LoA is all about promoting wargaming in a particular way. It is engaged with the public, visual and requires a ‘muck in’ sort of attitude.
This blog, which is open to anyone with an interest to contribute to is a perfect illustration of the LoA; Put something in and you’ll get something out!

So starts the next 20 years………… 

“Par la bouche de mes canons” QUEBEC 1690: Part 1

$
0
0
Barry Hilton - The inspiration for this piece was an article written by Rene Chartrand in 1999 but which I read for the first time in 2008 when some nice chap posted a link to it on the League of Augsburg forum. Occasionally we all happen on something that captures our imaginationdisproportionately and Mr Chartrand’s work did that for me. I was familiar with some of his output via the Osprey title The Army of Louis XIV (MAA 203) but was unaware that he had written on the subject of what has become known for posterity as King William’s War in the English speaking world. This is yet another name for the hostilities which took place on the North American continent during the Nine Years War 1688-1697. The relationship between these two conflicts finds a strong parallel in that of The Seven Years War and the so called French & Indian Wars. 

French defenders of Quebec

What I found so intriguing was that the New Englanders had actually mounted a seaborne invasion of the Canadasled by a colourful adventurer named Sir William Phips. The objective was the taking of the City of Quebecfrom the French. All of this was done without the help of London, the King, the Army or the English Treasury. Being contemporary with a period of European history in which I have a deep and long lasting interest I was excited by a new angle that being, the operation of conventional or semi conventional pike and musket armed troops in the thick forests of Canada. Not only did this galvanise me into doing some further and very rewarding research of my own it also provided me with an opportunity to create some interesting and extremely off beat scenarios for Beneath the Lily Banners.

This piece begins with a brief summary of the historical events on which the scenario is built. My sources for this are Mr Chartrand’s article and the book Frontenac and New France under Louis XIV by Francis Parkman written some 100 years ago. I don’t know if RC used this book as a primary source for his own writing or whether his information was gathered independently by I must acknowledge both sources as very helpful and in the main relatively un-contradictory. I have not quoted either text directly but rather paraphrased and added some of my own opinion in this first section.

100 Followers Lottery

$
0
0
Clarence Harrison - We're not there yet, but in honor of reaching 100 followers my lovely wife will throw percentile dice to generate a number from 1-100. I will count through the followers list as it appears here on the site and the lucky winner gets a very rare (I don't think Barry even has one) first edition copy of Beneath the Lily Banners!

This is the first book Barry and I worked on together. Even if you have the second edition this is a great addition. if only for all of the photos. If you haven't signed up do it now... there's no prize until we reach 100!

FEATURED REGIMENT: Regiment Languedoc

$
0
0

Barry Hilton - I absolutely adored painting the Copplestone designed figures offered by Dixon. The first French regiment I ever completed were these garcons. I recall the logic of choosing Regiment Languedoc at the time. I was still experimenting with the period, painting and basing styles thus picked a unit which was not too well known so that if I made any mistakes they would not blow the quality of my star battalion and put me off building more! I wonder if anyone else applies that somewhat risk averse approach. Almost like saving the best bit of your dinner till then end.

Languedoc were painted in 1992 and originally had 16 models, four per base. They were finished exactly in the same style as Mackay's, Prinds Georg, Montcashel's, Sjaellandske, Skaraborg and Ramsay's all of which were in my first batch of completed units. I later rebased them in BLB style, brightened up their uniforms, gave them new (larger) colours and changed their scarlet neck cloths to white. At the same time I added in several more models.

Of course in many respects they are unsuitable for French Grand Alliance period infantry. I know that now, 20 years on. Wrong coat cut, apostles when they probably should have flintlock and bag, grenadiers with fur hats, no ribbons. They have however, served both King Louis XIV and myself very well.


They have fought recorded 56 actions during which they achieved eight distinctions. Their average battle losses are 17.3%. Their own colours have been lost four times. Their finest table top hour came when they were the first French unit into Neerwinden (1693). They raised their battalion drappeaux on the clock tower to signify victory to Le Roi Soliel. They chased the Cameronians through the town on that particular occasion! Having fought this battle so many times and finally getting a French win was very sweet. The game was a mega affair in 1996 with about 4,000 figures.Also in the same year they stood before a village and were wiped out in a fire fight without a deterioration in their morale status! They once captured a heavy gun battery.


Their darkest hour came with a humiliating surrender without a fight at Branxton Hill in a 1689 scenario based around the Glorious Revolution. I recall the entire French contingent of a Jacobite force was cut off at the foot of Branxton Hill (The site of the Battle of Flodden in 1513) and compelled to lay down their arms to the enemy.

They are my oldest native French unit, real veterans and now due for retirement as the Warfare Miniatures French models begin to appear in the collection.

My Blenheim Project - Ferguson's Brigade

$
0
0
Ray King - This brigade was the third line of Lord Cutt's troops, but were the 2nd brigade to assault the village of Blenheim.
Ferguson's Regiment of Foot "The Cameronians" 
Lt.Colonel Commanding Alex Livingstone (Wounded in Action).
Raised in 1689 and in 1751 renamed the 26th Foot Regiment.
Their 1704 campaign establishment was 40 officers & 692 men.
Painted by LoA forum member 'Me Paints Good".

The Earl of Derby's Regiment of Foot 
Lt.Colonel Commanding Hans Hamilton (Wounded in Action)
Raised in 1688 and in 1751 renamed the 16th Regiment of Foot.
Their 1704 campaign establishment was 31 officers & 687 men.
Painted by Bob Lorton. 

Hamilton's Regiment of Foot 
Lt.Colonel Commanding Robert Stern.
Raised in 1684 and in 1751 renamed the 18th Regiment of Foot "The Royal Irish"
Their 1704 campaign establishment was 36 officers & 591 men.
Painted by Bob Lorton. 

Orkney's Regiment of Foot (2nd Battalion) 
Major Commanding Andrew Hamilton.
Raised in 1633 and in 1751 renamed the 1st Royal Scots Regiment of Foot.
Their 1704 campaign establishment was 37 officers & 813 men.
Painted by Bob Lorton.

1st Regiment of Foot Guards (1st Battalion) 
Lt.Colonel Commanding Henry Withers.
Raised in 1661 and their 1704 campaign establishment was 36 officers & 770 men.
Painted by LoA forum member 'Me Paints Good'.

You can find more about the Blenheim project on the Fighting Talk Forum


Beneath the Lily Banners in 15mm

$
0
0
Ray Rousell - Back in 2010 my pal Richard suggested a joint painting project, he quite fancied the Nine Years War. Now here’s where I have to admit to knowing absolutely nothing about this great period sandwiched between the more well-known English Civil Wars and the Wars of the Spanish Succession. So a quick look online and in my pal Posties book “From Pike to Shot” and I was hooked. Richard fancied painting up the French, so my obvious choice was the English and Allies.

The problem now was what figures? What scale? and what rules?

We did consider using 6mm and 25mm but decided against both, (Of course if Warfare minis where out at the time we would have used them!!! ) So it fell back to my favourite scale, 15mm. There were several ranges out at the time including Donnington, Hallmark and Essex. We chose Essex in the end mainly for the price, which has crept up quite considerably recently. Today you can buy 2, 18 figure infantry units with pikes for just under £20, with a few spare figures left over.

One of my favourite units. Leslie’s Foot, still using William Clifton’s old flags! These are all from Essex Miniatures

So there is an alternative if either you can’t afford 25mm figures, can’t or don’t like to paint 25’s or like many gamers haven’t got the space for a decent sized tabletop to use 25’s on. As for the rules we chose BLB first edition but soon switched to the 2nd when they were released soon after we bought our figures.

We weren’t too sure how to scale down the movement charts for 15mm, you can just change the inches to cm as suggested, but after a few tests we thought the rules work perfectly as they are, using the 25mm scales for movement and ranges. It didn’t seem to notice at all that you were using the 25mm ranges for 15mm.

Essex Dutch Horse

Once again we toyed with ideas for scaling down the base sizes and in the end settled for 35mm x 30 for infantry, 40x40 for Horse and Dragoons and 30x 40 for all artillery, using 2 actual figures on the base for Battalion guns, 3 for heavies and 4 for Positional guns. All the figures were stuck to the 30x40 bases for ease.

I don’t see why you couldn’t do the same thing for 10mm or even 6mm. There are some great looking figures for these two scales as well nowadays, Pendraken and Baucus to name two make some great looking figures.

10mm models for the League of Augsburg period from Pendraken

Another great reason to go for the smaller scale figure is that if like me you’re a bit of a leadhead you can have bigger battles!! Much bigger battles!!! I’ve already got far too many units but will I ever stop? Probably not!

Editor - We would like to welcome Ray Rousell as one of our guest authors. Ray is the proprietor of a hugely successful blog called Don't throw a 1 and a partner in Battleaxe Painting Service. He has a huge collection of 15mm units for the League of Augsburg period and his blog is a great resource if you are looking for flags or uniform information, especially for the Battle of the Boyne for which he has amassed all of the units that fought around Oldbridge!
Viewing all 1158 articles
Browse latest View live


<script src="https://jsc.adskeeper.com/r/s/rssing.com.1596347.js" async> </script>